
Following on from part one of this mini-series, where we discussed the different components needed to build your gaming PC, this article will cover the actual steps of the process, starting with:
Step 1: How to Install a CPU
The first step to getting your build started is by installing your CPU. You want to get yourself a nice clean area, take the motherboard out of the box and hold your CPU by the edges. Do not touch the underside where the pins or contact points are located.
Next, you need to lift up the retention arm located on the side of the socket, which will allow you to slot in your CPU. Ensure you are installing the CPU in the correct orientation – something you can do by finding the golden arrow on your CPU and the black arrow on your CPU socket. For AMD CPUs, the arrow is located on the underside near the CPU pins. For Intel processors, the arrow is located on the top side near the IHS. Match these two arrows, and that will ensure everything is matched up properly.
You do not need to apply any pressure to line the CPU up, and unnecessary pressure here can cause serious damage to the pins on the processor o the motherboard. Slowly drop the CPU in, and then close the retention arm. Fastening the retention arm can take some downward pressure, but you shouldn’t ever feel as though you are forcing anything.
Step 2: How to Install RAM (DDR4 & DDR5)
Installing your RAM is a much simpler process than installing the CPU. Locate the DIMM slots towards the top right of your motherboard, and pull back the retention clips on the top and bottom of the slot. Modern and high-end motherboards may only contain moveable clips on one side, simplifying the installation process somewhat. Orientate the RAM DIMMs correctly by aligning the notch on the DIMM slot with the notch on the RAM DIMM itself. RAM can be only be installed in one orientation, so if your stick isn’t going in, spin it around and try again.
Another thing to be conscious of here is which RAM DIMM slots you should use (and by extension, which you shouldn’t). For dual channel configurations (two DIMMs in a four-slot board), use the 2nd and 4th slots from the CPU. For single DIMM setups on a four-slot board, use the second slot from the CPU. For single DIMM setups on a two-slot board, use the first slot. It is always a good idea to double-check the motherboard manual at this stage, as RAM configs can differ on a motherboard-to-motherboard basis.
Step 3: How to Install an M.2 SSD
Installing your M.2 drive is relatively simple. You need to locate the primary M.2 slot (which will be the fastest). These slots are often located between the CPU socket and the first PCI-E x16 slot.
To install an M.2 drive, line up the drive with the notches on the connector and then screw in the drive. You will need to push the drive downwards so it sits flatter, but excess pressure is not required for this stage.
The length of M.2 drives can differ and drives with included heatsinks will be naturally thicker. Make sure these two factors aren’t likely to impact compatibility in your build before installing. It’s uncommon to find issues here, but a little caution never hurt anyone,
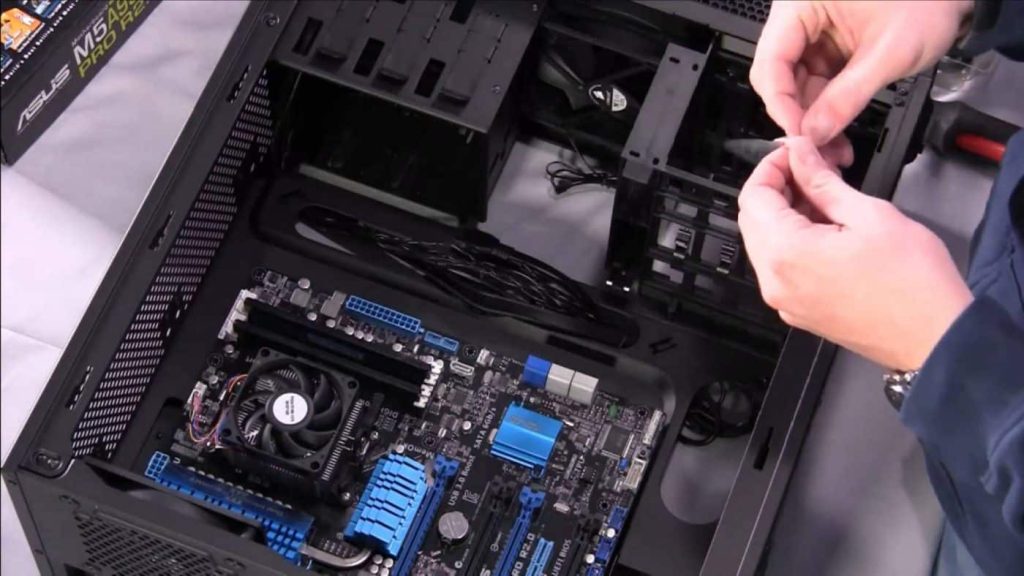
Step 4: How to Move a Motherboard Into a PC Case
Check the location of the standoff holes in your motherboard to see where it lines up within the case. A point to note is that motherboards come in different form factors, so the location of the holes may not line up with your case straight away.
Your case will have standoffs located in different configurations based on the size and supported form factors If your standoff holes don’t line up you’ll need to grab some pliers and move them into the correct configurations.
Before finally screwing the motherboard into place, you’ll want to check for an IO shield. Many premium motherboard designs have an integrated one, but if you’ve picked up something more budget then you will need to install a manual IO shield yourself. Your IO shield will be a shiny silver plate that installs next to the rear case fan. This will come included with your motherboard.
Once you’ve installed your IO shield, you can start to maneuver your board into the case. Line up the board by placing the ports through the rear IO shield, and secure them into place with the included case screws. Don’t tighten these screws too much as this can risk damaging the board, simply tighten them enough so that your motherboard doesn’t move.
Step 5: How to Install a CPU Cooler
CPU coolers can be a fiddly component to install, and certainly, add complication to a build. This step is what where a wall of text is not likely to suffice, given the number of components and stages often involved in this part of a build.
Follow the link here for a more comprehensive guide.
Step 6: How to Install a GPU
Arguably getting your GPU installed is the easiest part of any build. All you need to do is take the GPU itself and line the gold contact strip with your motherboard PCI-E slot. For pretty much all standard systems, you’ll be using the first x16, full-length PCI-E slot.
You may need to apply some pressure to click this in, before promptly securing it with screws at the rear of the case.
Step 7: Power Supply and Cables
Installing the power supply is quite an easy step, but you will need to take care installing the cables that come from it.
All PSUs contain a fan, which you can position up or down to make the best use of your case’s vents or airflow setup. If you have a way to exhaust air from the bottom of your case then you will likely want to mount it fan-side down.
To install the power supply, remove the rear side panel of your case, and slide in the PSU. If your power supply of choice is semi or full-modular we recommend plugging the cables in that you need beforehand. This step will help to keep cable clutter to a minimum.
Once the power supply is in, you need to look at installing all of the included cables. Every build will include the following cables:
24-Pin ATX Motherboard Cable: This is a 24-pin motherboard connector. This cable will slot into the long rectangular connector towards the top right of your motherboard.
8-Pin EPS 12V CPU Connector: This is a 12V EPS CPU power connector to deliver power to your processor. Dependent on your motherboard you may need to split the connector or plug in another cable to power your CPU.
8-Pin PCI-E Cable: PCI-E connectors are used to power your graphics card and various peripherals. These connectors can be split into multiple configurations and again you may need more or fewer cables dependent on your graphics card and the number of peripherals you have.
SATA Power Cable: SATA power is primarily used to deliver power for 258243 SSDs and hard drives They are relatively recognizable denoted by the 90-degree angular line These connectors can also be used to power fans and RGB peripherals.

Step 8: How to Install Front Panel Connectors
Before powering up your new build, there is one set of pesky cables you’ll need to complete first! Firstly you should locate a cluster of pins towards the bottom right of the board known as “JFP1”. This set of pins is needed to power the button to turn on your PC.
Once you’ve got all of the connectors in the right place you’ll also want to find “HD Audio” and “USB 3”. Both of these connectors are needed to power the front IO for your case. These don’t require precise action, you can simply plug in the connectors into their appropriate slots and you should be done.
Step 9: Cable Management
As we alluded to in Step 7, your build process can be made much easier by plugging in the cables, and tidying them away, as you go. With cases often including special channels and fasteners, you can more easily hide cables than before.
Even the best thought-out builds still require some cable management at the end, though. Tie up cables by category, and ensure they run to the closest possible grommets and hideaways.
Step 10: Power on your Build & Install an OS
With the more tricky steps in the bag, you can power on your new build for the first time! Ensure the kettle power lead is connected, alongside a mouse, keyboard, and monitor. Some builds actually fail to build if they do not detect a valid keyboard! This is also the point of the process where you need to connect up the bootable Windows USB you prepared earlier.
Flip the power switch on the back to the on position to on and press your power button… Did it work? Yes! In this case, you’ve successfully built your PC.
You need to tweak one or two settings before gaming, which will be done within your BIOS. BIOS stands for ‘Basic Input Output System’ and is essentially a basic operating system for the back-end of your PC build. To get into the BIOS, you’ll want to spam the delete key on your keyboard as soon as you’ve hit the power button. This will prompt you to hit the BIOS. It is also common for a PC to go straight to the BIOS when you have no active Windows or Linus OS installation.
With all of those steps complete… you’ve successfully built a PC! It was a long journey, but we got there in the end.
12 replies on “Step-by-Step Guide to Building the Perfect Gaming PC in 2023 – Part 2”
What’s up to all, since I am genuinely keen of reading this
website’s post to be updated on a regular basis.
It consists of good stuff.
Thanks for finally writing about > Step-by-Step Guide to Building the Perfect
Gaming PC in 2023 – Part 2 – Thebootupblog < Liked it!
I have read so many posts concerning the blogger lovers however this post is truly a pleasant piece of writing, keep it up.
Undeniably believe that which you said. Your favorite justification appeared
to be on the web the easiest thing to be aware of.
I say to you, I definitely get annoyed while people think about worries that they plainly do not know
about. You managed to hit the nail upon the top and defined out the whole thing
without having side-effects , people could take a signal.
Will probably be back to get more. Thanks
Hi, Neat post. There’s an issue with your website in web explorer,
may test this? IE nonetheless is the marketplace leader and a good component of other people will leave out your magnificent
writing because of this problem.
What’s up, every time i used to check weblog posts here
early in the break of day, since i love to find out more and more.
bookmarked!!, I really like your web site!
Everyone loves what you guys are usually up too. This kind of clever work and reporting!
Keep up the good works guys I’ve incorporated you guys to blogroll.
Excellent article. I will be experiencing a few of these issues as well..
Keep this going please, great job!สล็อตฝากถอนออโต้เว็บตรง
I am genuinely thankful to the owner of this web site who has shared this great article at at
this place.เว็บพนันสล็อตออนไลน์ดีที่สุด
Wonderful, what a webpage it is! This weblog gives valuable data to us, keep it up.